


When your beloved necklace succumbs to wear and tear or unforeseen accidents, fear not! Before you embark on a journey to mend it, the first step is to thoroughly assess the damage. In this chapter, we'll unravel the mysteries of identifying broken chains or links, dealing with tangled or knotted necklaces, and examining clasp and closure problems.
As Amazon affiliates we may earn a commission if you purchase a product at no cost to you.

Identifying Broken Chains or Links
A broken chain or link can be disheartening, but fret not - with a keen eye and some simple tools, you can get your necklace back in shape. Here's how:
Visual Inspection - Lay the necklace on a flat surface and inspect it closely. Look for any gaps or missing links in the chain. Be sure to check both sides of the necklace as the breakage might not always be apparent at first glance.
Gentle Tug Test - Gently tug the necklace from both ends to identify any weak spots or loose links. Exercise caution to avoid exacerbating the damage.
Magnifying Glass Examination - If needed, use a magnifying glass to closely examine the chain for subtle cracks or breaks that might be hard to spot with the naked eye.
Dealing with Tangled or Knotted Necklaces
Ah, the dreaded tangles and knots! They can turn your joy to frustration in a matter of seconds. But worry not - with patience and a few clever tricks, you can untangle the mess gracefully:
Take a Deep Breath - Patience is the key. Take a deep breath to calm yourself before attempting to untangle the necklace.
Use Lubrication - Apply a drop of baby oil, olive oil, or any lubricant to the knot. This will help the chain slide more smoothly, making it easier to untangle.
Needle or Pin Trick - Use a thin needle or pin to gently tease apart the knot. Be gentle to avoid bending or breaking the chain.
Examining Clasp and Closure Problems
A faulty clasp can leave you feeling trapped without your favorite necklace. Let's inspect and troubleshoot common clasp and closure problems:
Check the Alignment - Ensure that both ends of the clasp align properly. Sometimes, they might slip slightly, causing the necklace to come undone.
Clean the Clasp - Over time, dirt and debris can accumulate in the clasp, affecting its functionality. Clean it gently with a soft cloth or a cotton swab dipped in soapy water.
Replace or Repair - If the clasp is severely damaged or beyond repair, consider replacing it with a new one. Alternatively, seek professional help to mend intricate clasp designs.
With these guidelines in hand, you can now confidently assess the damage to your beloved necklace and take the necessary steps to restore its former glory. Remember, patience and a dash of creativity can work wonders in reviving your precious jewelry. Happy fixing!
A Pristine Playground for Necklace Restoration
Before delving into the enchanting art of necklace repair, creating a safe and organized workspace is of paramount importance. In this chapter, we will explore the essential steps of setting up your workspace, choosing the right repair technique, and cleaning and preparing the necklace for restoration.
Setting Up a Safe and Organized Workspace
A serene and clutter-free workspace is not only conducive to creativity but also ensures the safety of your precious jewelry. Follow these steps to establish a pristine playground for your necklace restoration endeavors:
Find a Well-lit Area - Natural daylight or good quality lighting is vital for inspecting the necklace thoroughly. Choose a spot near a window or a well-lit room for the best results.
Clean the Surface - Clear the workspace of any dust, dirt, or debris that could interfere with the repair process. A clean surface prevents accidental damage to the necklace.
Gather Essential Tools - Equip yourself with a magnifying glass, tweezers, small pliers, jump rings, and any other tools relevant to the repair technique you'll be using.
Use a Soft Surface - Place a soft cloth or ajewelry mat on your workspace. This provides a gentle cushion for your necklace and prevents it from slipping or getting scratched.
Choosing the Right Repair Technique
Each necklace damage is unique, and so should be your approach to repair. Consider the following factors when choosing the appropriate repair technique:
Assess the Damage - Refer to the insights gained in the previous chapter to determine the extent of the necklace's damage. This will guide you in selecting the most suitable repair method.
Evaluate Your Skills - If you are a novice in necklace repair, opt for simpler techniques that require minimal expertise. For complex repairs, consider seeking professional assistance.
Cleaning and Preparing the Necklace
Cleaning and preparing the necklace pave the way for a successful repair. Follow these steps to ensure your jewelry is ready for the magical restoration:
Gentle Cleaning - Use a mildajewelry cleaner or a mixture of warm water and a gentle soap to clean the necklace. Avoid harsh chemicals that might damage the gem or metal.
Pat Dry - After cleaning, pat the necklace dry with a soft, lint-free cloth. Make sure it is completely dry before proceeding with the repair.
Detangle if Necessary - If your necklace is tangled or knotted, refer to the appropriate technique from the earlier chapter to untangle it before moving on to the repair phase.
With your workspace impeccably prepared and your necklace gleaming with newfound brilliance, you are now primed to weave the magic of restoration. In the upcoming chapters, we shall embark on a journey of repair, where broken chains will be reunited, and tangled knots shall be untangled with grace and finesse. Let the enchanting art of necklace restoration begin!
Unveiling the Magic of Necklace Restoration
Prepare to embark on a magical journey of necklace restoration as we dive into a step-by-step repair guide. With a gentle touch and a sprinkle of creativity, you will soon witness broken chains reuniting, pendants finding their place, tangled knots unfurling, and clasps springing back to life.
Chain/Link Inspection
Before beginning the repair, it is crucial to conduct a thorough chain/link inspection:
Lay the necklace on a soft surface, ensuring good lighting for a clear view.
Examine the chain closely, searching for gaps, missing links, or weak spots.
Use a magnifying glass if needed to spot subtle cracks or damage.
Gently tug the necklace to identify any loose links or potential weak points.
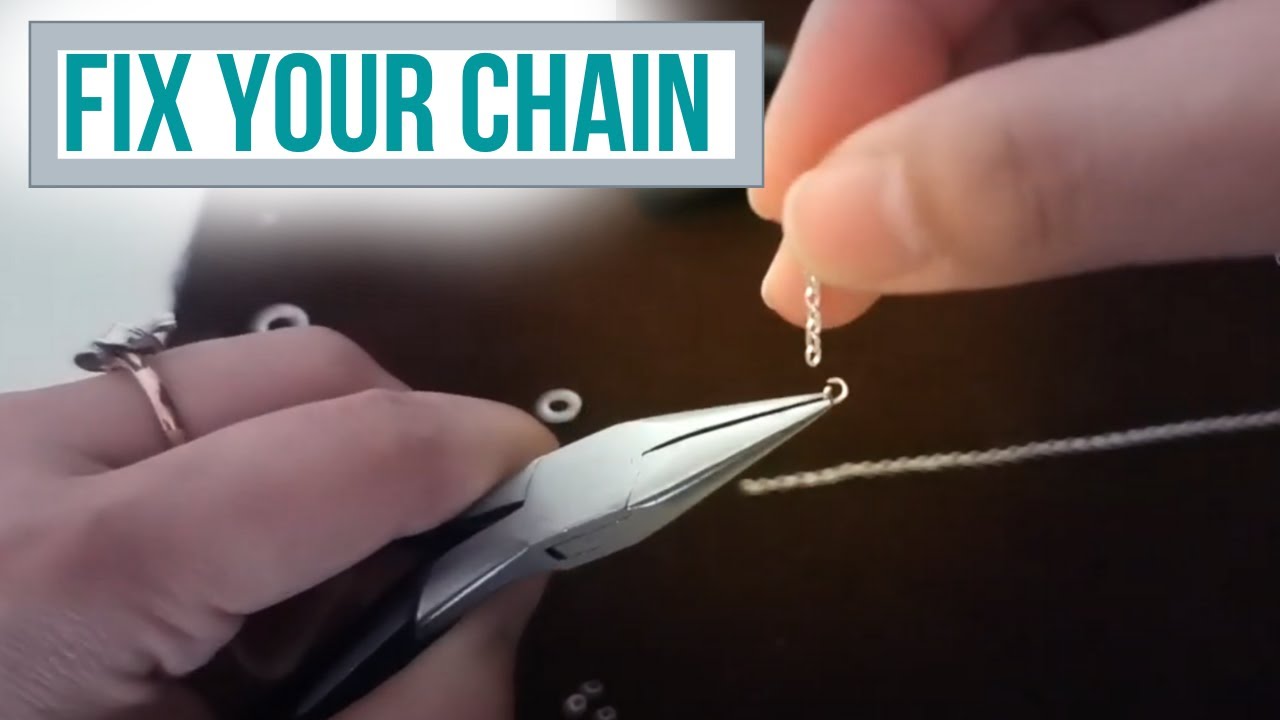
Chain/Link Repair or Replacement
Now that you have assessed the chain's condition, it's time to mend the broken links or replace them:
For a broken link: Use small pliers to realign the broken ends and gently close the gap. Ensure a secure connection.
If a link is missing: Use a jump ring that matches the chain's material and carefully attach it to reconnect the chain.
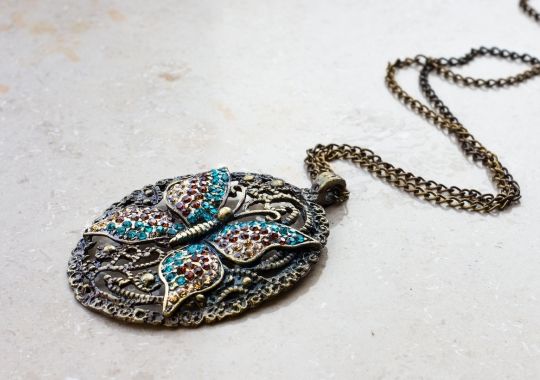
Step 3: Fixing Pendant or Charm Attachments
If your necklace features a pendant or charm that has come loose, let's rekindle their bond:
Inspect the pendant's attachment point and the necklace chain to ensure both are clean and free from debris.
Reattach the pendant or charm by using jump rings or small pliers, depending on the design.
Make sure the attachment is firm yet allows the pendant to move gracefully.
Unknotting a Tangled Necklace
Ah, the art of untangling a necklace - a true test of patience and finesse:
Lay the tangled necklace on a flat surface and take a deep breath to stay calm and focused.
Apply a drop of lubricant (baby oil, olive oil) to the knot to ease the untangling process.
Gently use a thin needle or pin to tease apart the knot, avoiding any sudden pulls or tugs.
Proceed slowly and methodically until the knot is entirely undone, maintaining gentle pressure throughout.
Repairing or Replacing the Clasp
To complete the restoration, let's turn our attention to the clasp:
Inspect the clasp carefully, checking for misalignment, dirt, or damage.
Clean the clasp with a soft cloth or a cotton swab dipped in soapy water.
If the clasp can be repaired, use small pliers to realign any misaligned parts or fix minor issues.
If the clasp is beyond repair, replace it with a new one that matches the necklace's design and material.
With these five enchanting steps, you have the power to revive your beloved necklace and bring it back to its former glory. Remember, each repair is a unique journey, so exercise patience, creativity, and gentle care. Embrace the magic of restoration, and soon your treasured necklace will shine brighter than ever before, ready to adorn you with beauty and joy. Happy repairing!
DIY vs. Professional Repair
As you embark on your necklace repair journey, you may find yourself contemplating whether to venture down the DIY path or seek the expertise of a professional jeweler. In this chapter, we'll explore the factors to consider when deciding between DIY necklace repair and professional assistance, as well as the benefits and cost considerations for each option.

When to Attempt DIY Necklace Repair
The allure of DIY necklace repair can be tempting, especially for those with a creative spirit and a desire to preserve their precious jewelry personally. Here are some scenarios when attempting DIY repair might be the right choice:
Minor Damage: If your necklace has minor issues, such as a loose link or a simple clasp repair, DIY might be a suitable option with the right tools and a steady hand.
Comfort with Repairs: If you have experience in DIY projects, particularly with jewelry or crafting, you may feel confident in tackling necklace repairs.
Sentimental Value: If the necklace holds immense sentimental value, you might prefer to repair it yourself to ensure a personal touch and a deeper connection to the restoration process.
The Benefits of Professional Repair
While the magic of DIY is captivating, entrusting your necklace to a professional jeweler comes with its own set of enchanting benefits:
Expertise and Skill: Professional jewelers possess specialized knowledge, skills, and tools, ensuring meticulous repairs and safeguarding the necklace's integrity.
Complex Repairs: For intricate designs, delicate gemstones, or severely damaged necklaces, professional repair ensures the best chances of a successful restoration.
Professional Assessment: Jewelers can accurately assess the necklace's condition, identifying any hidden issues that may not be apparent to an untrained eye.
Long-lasting Results: Professional repairs often come with a guarantee or warranty, providing peace of mind and assurance that the necklace will endure over time.
Cost Comparison and Considerations
The enchantment of DIY is complemented by its potential cost-effectiveness, but let's weigh the cost considerations for both options:
DIY: DIY repairs might seem less expensive upfront, but keep in mind the cost of tools, materials, and the possibility of needing to correct mistakes, which could increase expenses.
Professional Repair: While professional repairs may have a higher upfront cost, the investment ensures quality results and reduces the risk of potential damage due to incorrect repair attempts.
Value of the Necklace: Consider the value of the necklace, both sentimentally and monetarily, when deciding between DIY and professional repair.
Ultimately, the choice between DIY and professional repair lies in your confidence, skills, and the complexity of the necklace's damage. For treasured heirlooms or intricate designs, professional assistance is a wise choice. However, for simple repairs and personal connection, DIY can add its own touch of enchantment. Whichever path you choose, may your necklace's restoration journey be filled with magic and wonder, preserving its charm for generations to come. Happy repairing!
Conclusion
In the enchanting tale of necklace restoration, we have embarked on a captivating journey, delving into the realms of DIY repair and professional assistance. From assessing the damage with a keen eye to untangling the knots with gentle finesse, we have learned the art of reviving broken chains, reuniting lost pendants, and breathing life into worn clasps. Each step on this magical path has brought us closer to the cherished beauty of our beloved necklaces.
Recommended Article
 Charlie Mills
Frequently Asked Questions FAQs
Can I fix a broken necklace at home?
Yes, you can! With our step-by-step guide and helpful tips, you'll learn how to fix a broken necklace safely and effectively in the comfort of your home.
Is DIY necklace repair difficult for beginners?
Not at all! Our DIY repair techniques are designed with beginners in mind. With some patience and a few tools, you'll master the art of necklace restoration in no time.
Should I opt for professional necklace repair for intricate designs?
For intricate or valuable necklaces, professional repair by skilled jewelers is recommended. They possess the expertise to handle complex repairs and ensure the necklace's longevity.


